Disclaimer: This post may contain affiliate links, meaning we get a small commission if you make a purchase through our links, at no cost to you. For more information, please visit our Disclaimer Page.
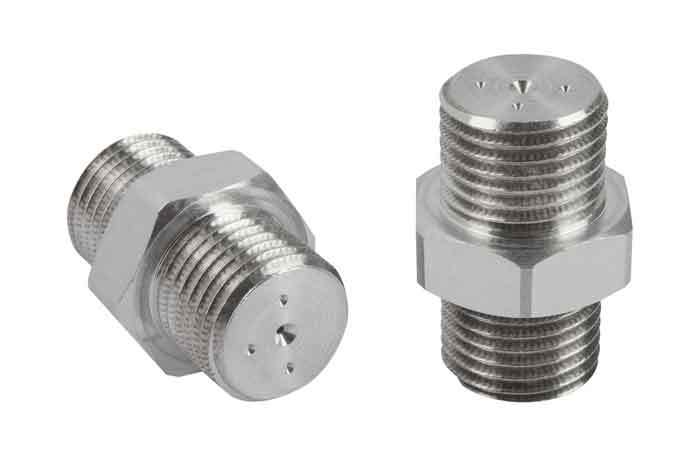
A flow restrictor is a convenient tool that is able to limit your water consumption. It’s installed in most of the faucets inside your household and it regulates the water pressure as well as the consumption of water.
Not only that the reduced water pressure helps to keep a healthy environment, but also, it helps a homeowner with the water bill as well. However, if you suffer from low water pressure, removing the flow restrictor is essential.
In that light, let’s see how to remove a flow restrictor from your bathroom faucet. Let’s begin.

Prepare for the Job
Since we agreed that removing the flow restrictor can increase your water pressure, it’s important first to get some tools in order to do so. Here’s the list of the tools you need:
- A towel
- Flat-head screwdriver
- Rubber-strap wrench
As you can see, you’ll need to do a bit of digging into the faucet. But, it only takes a couple of minutes to do the whole process.
How to Remove Flow Restrictor from Bathroom Faucet
It’s quite important to know that all bathroom faucets are equipped with a flow restrictor.
However, some models have their flow restrictor installed inside an aerator. On the other hand, some models have a single flow restrictor that’s separated from the aerator.
In that case, we will explain how to remove it on both models.

Single Flow Restrictor
It’s quite simple to do it. You just need to know how to detach it from the inside of the faucet head.
Step 1 – Inspect the faucet
The first thing that you need to do is to inspect your faucet and determine whether it’s the single flow restrictor or a flow restrictor in an aerator.
Once you do that, and if you determine that the flow restrictor is in a single installation, you can start to remove it.
Step 2 – Twist it with an adjustable wrench
Removing the flow restrictor from a faucet is easy.
However, you will need to use an adjustable wrench, and, that means that you need to twist the faucet head. In case you do that without any protection, you are risking damaging the surface of the faucet head.
Since you don’t want that to happen, we highly recommend using a rubber band. Just attach a rubber band to a flow restrictor and then apply pressure with an adjustable wrench.
This way, the wrench won’t be able to damage the faucet head, and you’ll be able to remove a flow restrictor with ease.
Step 3 – Rinse the flow restrictor
Once you removed the flow restrictor, it’s time to inspect it. It’s normal to see some kind of build-up on the flow restrictor.
That’s mostly minerals that come from water which could create clogs if you neglect them.

Flow Restrictor in the Aerator
When it comes to flow restrictor that’s located inside the aerator, the whole process of removing it requires a bit more effort. Let’s see.
Step 1 - Block the drain
Since you are going to work with small pieces that might fall into the sink, it’s quite important to block the drain first. This way, you will ensure that whatever falls inside the sink stays there.
It’s recommended to use a piece of rubber to block the drain. However, it would be best if you have a drain stopper to block the drain.
In any case, the goal is to block the drain and not worry about something falling in the sink.
Step 2 - Unscrew the aerator
Once you prepared the sink, it’s time to start working on the faucet. The first thing you need to do is to locate the aerator. It’s usually positioned on the end at the faucet. Now, you need to unscrew it with your hands.
However, this process might be a bit harder than you suspected since aerator is probably stuck due to all the mineral deposits around it. In that case, you will need to use an adjustable wrench in order to remove the aerator.
Don’t forget to put a piece of rubber on the aerator first and then use an adjustable wrench. That way, you will ensure that your aerator stays undamaged and without scratches. That being said, you need to pull counter-clockwise in order to unscrew the aerator.
Step 3 - Inspect the aerator
After you removed the aerator from the faucet, it’s time to inspect it. Everything you need to do is to turn the aerator over and see if you can find the flow restrictor. Usually, the flow restrictor looks like a flat-screen.
Once you find it, you should be able to remove it without any complications.
Step 4 - Remove the flow restrictor
The best way to remove the flow restrictor is to use your fingers. However, some people simply can’t stick their fingers into the aerator and, in that case, a flat-head screwdriver can help. Just take the flat-head screwdriver and push one side of the restrictor inside.
The other side will pop out and you will be able to use the screwdriver to remove it without any complications. Just remember that you need to do this slowly and gently since you don’t want to damage any parts of the aerator.
Step 5 - Screw back the aerator
Once you did everything as we explained, it’s time to screw the aerator back onto the faucet and check the water pressure. Since you removed the flow restrictor from the faucet, the water pressure should be better or at least a bit noticeably higher.
Make sure not to tighten the aerator too much on the faucet since you don’t want to damage it in any way.
Conclusion: Removing Flow Restricter from Bathroom Faucet
For people that suffer from low water pressure, removing the flow restrictor might solve this problem. It’s certainly not that hard to remove it no matter the type of faucet you have inside your bathroom.
All in all, just follow the instructions and you’ll be able to remove a flow restrictor without any complications.
