Disclaimer: This post may contain affiliate links, meaning we get a small commission if you make a purchase through our links, at no cost to you. For more information, please visit our Disclaimer Page.
Installing a shower valve can surprisingly cause some unpredicted plumbing problems.
Using a traditional plumbing method for doing this could also create threading problems on the pipe, so you could make yourself a serious plumbing issue, and might be forced to call a plumber.
That being said, it is the perfect time to think about an easier alternative, which you can pull off on your own, without gluing the pipes or connection problems.
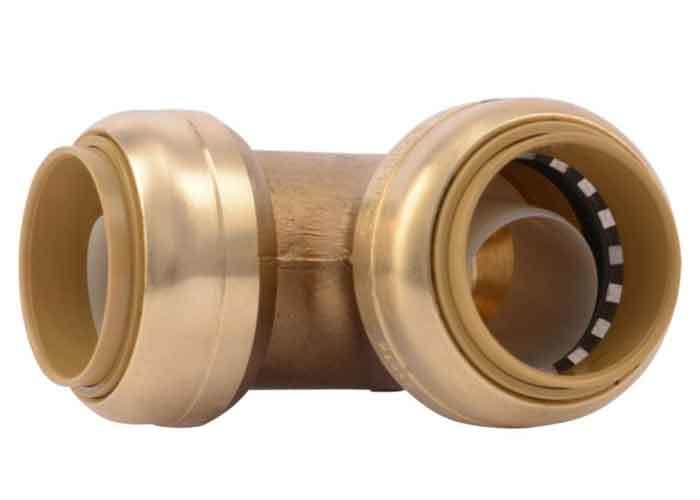
A SharkBite fitting can be used to make a strong connection with the grip on the pipe without the need to use glue, plumbing tape, or similar things.

What is a SharkBite Fitting?
SharkBite is a common name for all kinds of pipe fittings that this company produces.
The name is given based on a fact that this fitting has a teeth-like ring which creates a strong connection and prevents the possibility of leaking.
Sharkbite is used to connect various types of pipes and ensures a strong and reliable connection.
And now, let us see how you can install a SharkBite fitting without any complications.

How to Install a Shower Valve with Sharkbite
Probably the best thing about SharkBite is that you simply push a tube into the fitting and when you hear a certain sound, you will feel that it grabbed a hold on the pipe.
This way you will know for sure that you installed your shower valve with a waterproof seal, and don’t have to worry about the efficiency of this method.
Follow these simple steps to guide you through the installation procedure.
Step 1
First, shut down the water supply inside your bathroom since you don’t want any leaks to happen during the installation. Find a suitable place on your wall which you want to use for valve installation.
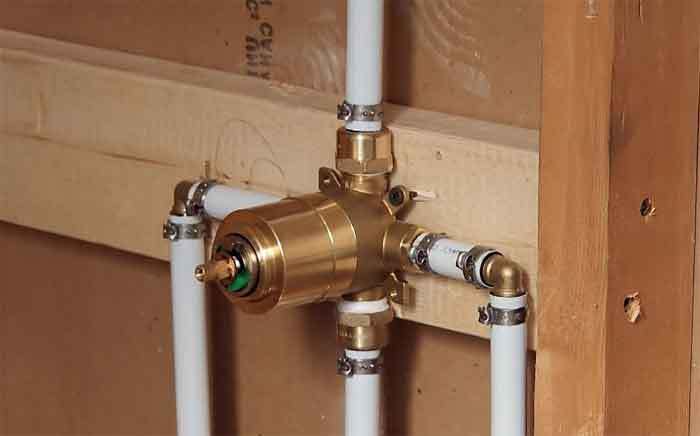
Put it there while following the instructions made by the manufacturer and make sure to use Sharkbite with the PEX tubing.
Step 2
Use the screwdriver to attach the valve to a wooden block that comes with the package. Firmly screw it at the position in the wall stated by the manufacturer.
Prepare your Sharkbite fittings for use and take notice of the inserts inside the fittings.
Use the tool for cutting copper pipes to make some precise cuts. Then turn it in the direction that the arrow indicates. Afterward, use the deburring tool to deburr the inside of the pipe. If you do not own this tool, you can also use a utility knife.
Step 3
When that is done, use a Sharkbite depth tool that has multiple extensions for sliding on to the pipe and make a mark. This way you will know precisely how deep should you slide the fitting, no matter how long the copper pipe is.
Next, attach the Sharkbite to the pipe system around your valve. If you have copper fittings, Sharkbite should fit perfectly by merely pushing it in the pipe.
Step 4
Mount the teeth-like ring of the SharkBite around the pipe, making sure that it is connected to the surface of the pipe.
Be careful to connect the fittings for cold and hot water accordingly. The outlets on the valve are all on the same side, so just connect the fittings right.
Once you have the Sharkbites put on, it is super simple to use it. You can rotate them to adjust your angle and even pull out and reassemble a connected part of the pipe system.
Step 5
Put on the pipe dope to the threads on your shower valve to make a waterproof seal. You can also use plumbing tape for this purpose.
Notice that if the fitting is not bonded firmly to the pipe it can cause a rupture and leak in your tubing. Make sure to check if the lengths of the pipe are nicely connected to the fittings of the SharkBite on your shower valve.
Step 6
The last step is to make sure that there are no leaks in your pipes. Turn the water supply back on and slowly turn the hot water on.
This should tell you if your valve is placed correctly without leaks, and you can slowly boost the water pressure to be absolutely sure.
Using and Replacing a SharkBite
Unlike ordinary plumbing fittings that work best with plastic pipes, Sharkbite fittings are intended to work best with copper. They also work with CPVC and PEX tubing.
The interesting fact about SharkBites is that you can always reuse the SharkBite fitting.
However, the manufacturer states that you have to be very careful when reusing the SharkBite, having in mind that it can be damaged a little bit from each pipe you put it on and take it off.
That being said, be very cautious when replacing the Sharkbite for you do not want to have a leak in your pipe system.
Is SharkBite Reliable for Your Home?
Yes! SharkBite is definitely reliable for your home. The estimated life expectancy rate of each Sharkbite fitting is 25 years!
This is because Sharkbite fittings do not require you to use glue or mess with the internal of the pipe. As the manufacturer states, there is no possible way Sharkbite can cause a leak in your plumbing system.
They are also cheap for servicing if it comes to that and very easy to remove from the pipe, once they are attached.
Conclusion: Installing a SharkBite Shower Valve
Changing the pipe or installing the shower valve can be very tiring and hard work. It can also be very dirty work considering how dusty and filthy the insides of the pipes can be.
That is exactly why the SharkBite method is the best and easiest way of doing this in your household and with not much more help than your own two hands.
Hopefully, all the instructions you need can be found in this text and if you have any other difficulties, there is a manual that comes with the product.
In the end, Sharkbite can be used over and over again when installed properly, making it the perfect fitting to use when installing your shower valve.
