Disclaimer: This post may contain affiliate links, meaning we get a small commission if you make a purchase through our links, at no cost to you. For more information, please visit our Disclaimer Page.
If you find that you are struggling to get your toilet clean of mold, rust, other substances, and are still greeted with a foul odor after scrubbing the bathroom to a shine, then your work may not be done. You shouldn’t put yourself down for missing a spot because this is one that always gets overlooked: the toilet tank.
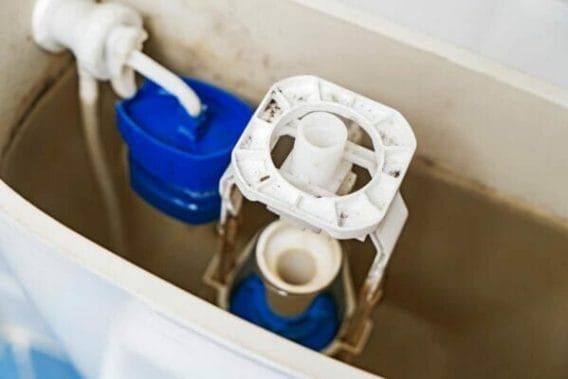
Its lid traps any bacterial contaminants, dirt, and mineral accumulation out of your sight until you are forced to lift it up to prevent the toilet from running or look for any parts that need to be repaired. These less-than-ideal conditions can also result in your toilet’s metal components corroding and staining the bowl.
Let’s take a look at how to clean your toilet tank of mold and how to keep it mold-free for longer. So read on to find out how to clean toilet tank mold.
How to Clean Toilet Tank Mold: A Step-by-Step Guide
In order to clean out your toilet tank, you are going to need a few materials and tools. Here they are:
- Thick rubber gloves
- Scrubbing brush with a long handle
- Sponge
- Natural toilet tank cleaner
- Disinfectant cleaner
- White vinegar
Once you have those, you can begin the process of cleaning the toilet.
Step One - Empty the Tank
Start by emptying the tank. To do this, find the water valve, which looks like a tap valve on the wall near or behind the toilet’s base, and turn it off. Then, remove the lid from the tank so that you can check the water level inside and flush the toilet until it is completely drained. This may take two or three flushes, depending on your flow rate.
Step Two - Assess the Tank
Now it’s time to assess your tank’s condition. If you only see dirt and grime on the surface, then the cleaning job will be quite simple, requiring just a bit of scrubbing. If that’s the case, then you can skip to Step Three.
However, if you notice a discoloration from residue and mineral deposits that have built up at the bottom of the tank and climbing up the walls, then you’ll need something more potent. This is where the vinegar comes into play.
It will help defend the tank against hard water depots, mildew, mold, and more. You are going to need enough vinegar to fill up the tank to the overflow valve, which could be as much as 3 gallons, depending on how big your tank is.
Pour the vinegar in, and allow it to sit for 12 hours with no flushes. When you’re ready to clean it out, flush all the vinegar away, which could take two or three flushes again.
Step Three - Apply Disinfectant
With your rubber gloves on, spray a generous amount of disinfectant cleaner along the bottom and walls of the tank. Try to avoid spraying the metal parts to prevent any corrosive additives from reacting to the metal.
You will generally want to let the disinfectant sit for about 15 minutes, but be sure to check the label on the bottle for the suggested dwell time.
Step Four - Scrub the Tank
Now it’s time to get your scrubbing brush. While you might want to use your everyday toilet brush for this, we recommend using a new one so that you are not further contaminating the tank with any substances that might be on your toilet brush.
The bristles should be more on the firm side, and they should be shaped in a way that lets you get to the corners and the bottom of the tank with ease. After you have finished waiting for the disinfectant to work its magic, scrub it away thoroughly.
Be sure to get around the fixtures, into corners, and all over the bottom. Remove all build-up and grime, and apply more cleaner as you see necessary.
Step Five - Assess for Maintenance
While the lid of the tank is still off, stop to assess whether or not your toilet needs some maintenance. If it doesn’t, then move on to Step Six below.
Step Six - Clean All the Working Parts
Now you’ll want to clean all of the working parts within the toilet tank. Rather than spraying them directly and drowning the metal pieces with a cleaner that might be corrosive, first dilute it.
Soak a sponge in some warm, clean water, and spray a bit of cleaner onto the sponge itself. You can then wipe the flapper, ball float, and other working parts down with the diluted solutions. Repeat this process as necessary.
Step Seven - Switch the Water On
You can now turn the water back on again and allow the tank to fill up. Flush it a few times to get things moving, and consider whether or not the tank seems clean enough to you. If it doesn’t, drain it and repeat from Step One.
When you’re satisfied with the sparkle of your porcelain throne, you can turn the valve back on and get back to business as usual.

What Causes Toilet Tank Mold?
Because bathrooms generally have higher levels of humidity, it is easier for airborne mold spores to root themselves in a toilet bowl because they are frequently left open. Stagnant water is the ideal environment for mold to grow, and toilets that are not used very frequently and are not flushed often are more likely to develop an issue with mold.
If you are experiencing mold in your toilet tank, then those spores are being passed to the toilet bowl. However, the reverse is not true - you can have a moldy toilet bowl without having a moldy toilet tank.
Final Thoughts
Keeping your toilet tank and bowl free of mold is crucial to the health of you and your family. If you are noticing mold anywhere on your toilet, then it’s time to give it a thorough cleaning using the method we prescribed above. We hope that this article has been helpful and that you’ll never have to suffer with toilet mold again.

